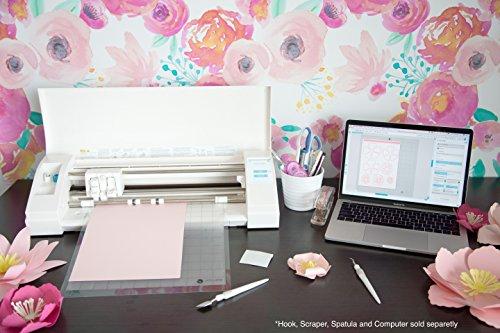
How to Heat Press a Hat without a Hat Press!
Did you know that you can have fun creating a custom hat design without actually having to purchase a special hat press?

Now, it might be obvious, but it is, of course, heaps easier to create hat transfer design using a special hat press. And if you know that you will be making custom hats or caps on a regular basis, it probably will be worth your while to invest in a decent hat press.
But if you only enjoy making custom hats on the odd occasion it would be a waste of money to purchase a hat press, when you can simply make it on your normal heat press. And if you don’t have a heat press yet, we suggest you start off by reading through our heat press reviews first.
Step-by-Step Tutorial on How To Heat Press A Hat
Find below some super easy instructions on how to add a heat transfer vinyl design to your hat (or cap) without actually using a special hat press.

Materials Needed:
Note: Don’t use regular standard heat transfer vinyl with this method. Whilst you can use normal vinyl when you use a special hat press, it is too thin and will wrinkle when you move your hat on a normal heat press.
Instructions:
1. Adhere your Teflon sheet to your upper platen using the magnets (see video below for a visual representation of this).
2. Heat up your heat press
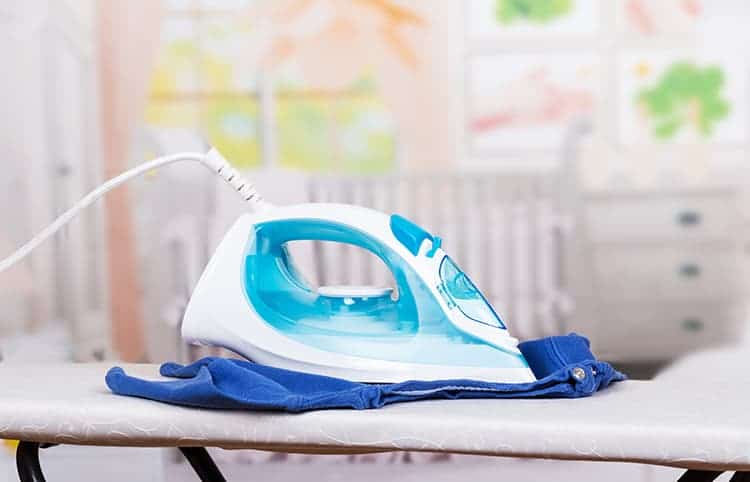
3. Pop on your oven mitt or use your thick fabric to protect your hand as you press and roll the hat against the platen to remove any wrinkles and moisture.
4. Next, fold your trimmed down transfer design in half to mark the center of the mask.
5. Adhere your design to the center of the hat (or where ever you want) using the heat tape.
6. Again pop on your oven mat or grab your thick fabric. Press your hat against the upper platen for 5-10 seconds. Carefully remove the hat and have a look to see if any other sections need to be pressed as well (this will depend on the size of your design).
7. Once you think it is properly adhered, carefully start peeling it off. Keep an eye out for any parts that might not be properly pressed. If you see any of the design coming off the hat, simply lay down the transfer tape and repeat the press process until you can remove the mask.
8. At this point, you might notice that the hat is a bit flatter than normal. You can fix this by squeezing the front of the cap towards each other to give it some shape again. You might also like to wrap a rubber band around it and leave it to ‘set’ as it cools down to give it shape again.
If you prefer visual instructions, here is a video just for you:
Now, of course, the easiest option to press hats is of course by using a special hat press machine. If you happen to have purchased a 5 in 1 heat press, you might have one of these handy gadgets with you.
Here is a quick video to show you how you can use a hat press to heat press a design to your hat:
And there you have it! I hope you found these steps really easy to follow along with and as always if you have any further questions please pop them in the comments down below.

via The Best Vinyl Cutters | Reviews & Guides https://www.thebestvinylcutters.com/how-to-heat-press-a-hat/

Posted on August 13th, 2018
What Do I Need to Print T-Shirts at Home?
Keen to make your own custom t-shirts at home? Whilst it is a bit of a process and it might take a few dollars to set yourself up properly, it definitely is a super fun hobby!
Find below our suggestions and recommendations of what you will need in order to produce some professional t-shirt transfers that will last through the years (and through all the washes).
A List of What You Need to Print T-Shirts at Home
Find below a detailed list of tools and materials you will need to start printing your own shirts at home.

1. A Computer/Laptop/Tablet
A computer (or similar) will allow you the flexibility of being able to download an SVG file that you find online. It is also needed for most of the graphics software program. Fortunately, most of us do already have a computer at home.
2. A Graphics Program
A graphics program is essential to help you create custom images and art for your shirts. This is where you can flip, rotate or enlarge images found online. Before you hop online and purchase a graphics program, it might be worth waiting till you purchase your cutting machine as many cutting machines come with a free version of their software. And many of these cutters will ONLY work with their software.
If you do happen to purchase a cutter (typically more expensive) that allow you to use your own software, we absolutely love both CorelDraw and Photoshop.
3. A Printer
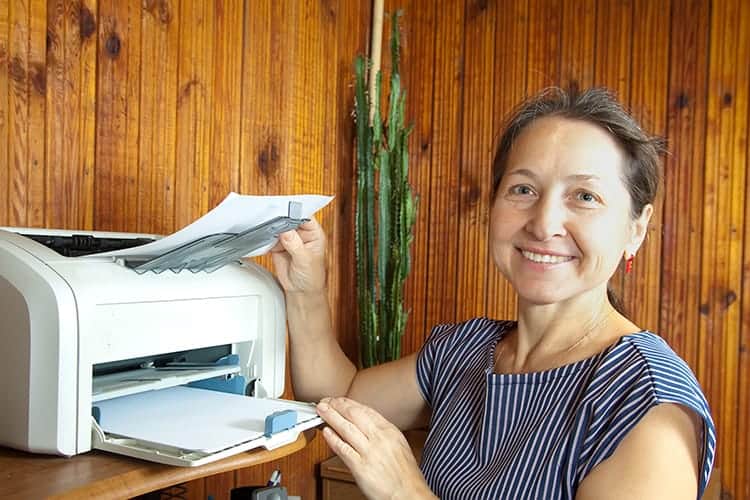
Once the image has been created with software on your computer, you will need to print it out. You might find that the printer you have at home, might already be able to handle this step. But it is important that you buy the right type of transfer paper (see the next point) for your type of printer.
The four main types of printers are inkjet, laser, sublimation, and solvent printers. You will typically find either an inkjet or laser printer in homes. Solvent printers offer the best graphics, but they are also more expensive, so we only recommend this type of printer if you end up getting serious about your hobby.
4. Heat Transfer Paper
You will need special paper to transfer your image from the printer to your t-shirt. This paper is called transfer paper.
Transfer paper is a special paper that has a polymer film on it. This film creates a permanent image when printed onto.
Once the image is printed, you will need to heat press the paper against your t-shirt for a preset amount of time. The press with help the polymer film make a permanent bond with the fibers of your t-shirt. And that is how the image is transferred to the fabric of your t-shirt.
Make sure you invest in good quality transfer paper as cheaper papers tend to fade and crack more quickly.
We absolutely love Jet Pro Soft Stretch for Inkjet printers and Techni-Print EZP for Laser printers.
NOTE: In the next step we will discuss cutting machines. Some cutting machines have the ability to both print and cut in one step. If you have one of these machines, you will not need to purchase a printer separately as your cutting machine can obviously do the printing for you.
5. A Cutter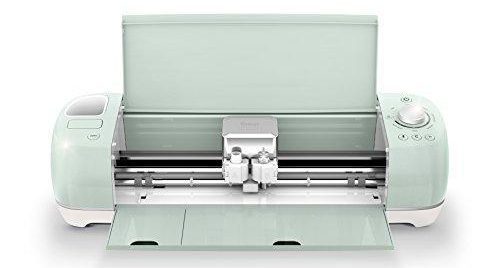
You will need a cutting machine in order to cut out your designs. Once you print your design onto the transfer paper, you will need to cut around the design in order to remove all the excess paper.
Cutting machines are fabulous as many of them have the ability to print and cut in one single step. It truly simplifies the whole design process and gets rid of the need for a sperate printer. Simply send your design from the computer software to the cutter and set it to print and cut your design. Easy peasy.
If you need to purchase a cutting machine, we have a fabulous helpful guide on the best cutting machines to purchase.
6. Heat press
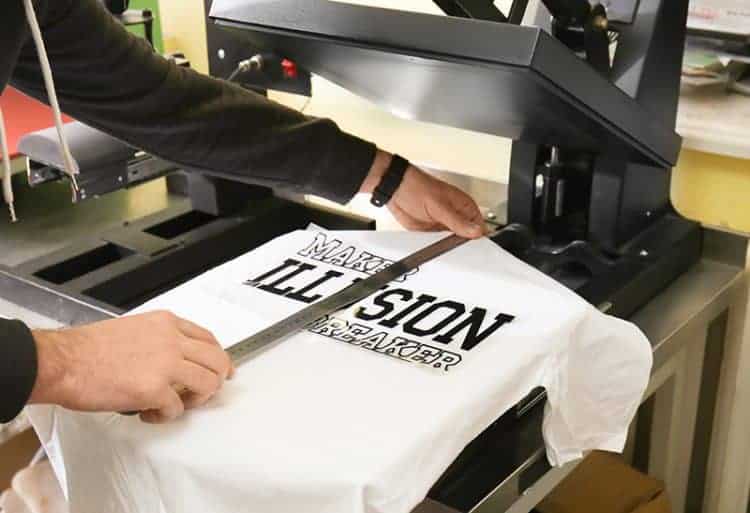
Lastly, you will need a home heat press. We highly recommend that you invest in one that is at least 16’x20″. Once your design is printed and cut, you will need to heat press the design onto the t-shirt.
The heat will essentially cause the ink to bond to the fabric, so it is important to follow the heat and time settings that are recommended on your transfer paper packet instructions. If you get the heating temperature or timing wrong your design might not adhere correctly and come off in only a few washes.
NOTE: If you want to save some money, you might prefer to use some iron-on vinyl together with a home iron to create your t-shirts. In which case you can skip the purchase of the heat press machine.
This might be a great idea if you only wish to make a few t-shirts. However, it is important to note that a heat press will give you longer-lasting results.
And there you have a list of what you would need in order to create some beautiful, professional-looking t-shirt prints at home.
Please let us know if you have any questions in the comments below.
Further Reading:
via The Best Vinyl Cutters | Reviews & Guides https://www.thebestvinylcutters.com/need-to-print-t-shirts-at-home/

Posted on August 9th, 2018
Step-by-Step on How to Clean a Heat Press
After investing so much money and buy a heat press machine it only makes good sense to take the time to look after it. And to do so, you will find that you need to clean it when things get stuck to the platens.

At some point or another, you will most likely see a build-up of dirt, residue, adhesive and/or excess ink on your platens. It is important to keep them residue-free in order to ensure that you get a clean heat press transfer whilst working on your next product.
It is also important to act quickly when you do notice the build-up of residue on your platens, as ongoing exposure to high temperature will cause the mess to ‘cook’ on to the heat press, making it more difficult to remove in the future.
Below you will find some great simple and easy to follow steps on how to clean your heat press machine.
How to Clean your Heat Press Machine
You will know when your machine needs a clean after an incident such as an ink-blowout or when you accidentally pop the image the wrong side up (which will cause the ink to stick to the upper platen). It is also important to keep an eye on the residue and adhesive build-up as well.

Fortunately cleaning a heat press is easy and doesn’t take a lot of time! Find below a list of materials you will need as well as the steps that are required to give your machine a quick refresh.
Materials Required:
How to Clean a Heat Press Machine:
1. In most instances, you want to turn your machine off and let it cool down before attempting to clean it. Lowering the temperature typically makes a heat press easier to clean.
2. Grab your large clean lint-free cloth and cover it with a decent amount of cleaner (suggestions in the materials list above).
3. Gently rub the cloth over the platens to remove any of the mess.
You will most likely find that your platens are nice and clean at this point. Occasional you might still have some residue left, so at that point, you want to continue cleaning by adding the next few steps.
4. Heat up the machine.
5. Fold your cloth nice and thick so that it will protect your hand from the hot plates (or wear some heat-proof gloves).
6. Pop a decent amount of EZ Off Hot Iron Paste onto your cloth and give the plates another wipe down. This should remove any residue that remains after the first clean.
Lastly
7. Use an old shirt and simply do a clean heat press onto this shirt. This step will help to get rid of any impurities and residue that you might have missed whilst cleaning. It will also get rid of any excess cleaning paste or residue that might have remained on the platens.
Tip: If you find that your heat press still has some mess cooked on to its platens even after following the above steps, we highly recommend that you purchase some protective paper and use this to protect your garments from the upper platen mess. Not only will the protective paper protect your garment but it will also help the mess to ‘cook out’ over time.
The easiest way to prevent your machine from getting dirty is to protect the platens from a potential mess. We always heat press with a Teflon sheet to protect both our platen from potential ‘mess’ as well as to protect our garment from picking up unnecessary residue during the heat press process.
We hope you now have all the tools and steps required to clean that machine. Do let us know in the comments below if you have any questions.

via The Best Vinyl Cutters | Reviews & Guides https://www.thebestvinylcutters.com/how-to-clean-a-heat-press/

Posted on August 6th, 2018
How to Print on Vinyl with an Inkjet Printer [Tutorial & Tips]
Can you print on vinyl with an inkjet printer? Yes, you can!
Would you like to know how to print on vinyl using the inkjet printer that you have at home?
Whilst we prefer printing and cutting our vinyl with a vinyl die cut machine, there can be reasons why you would need to use an inkjet printer instead.
It might be that you simply want to create once-off vinyl pieces and therefore don’t want to invest in a machine that you will never use again.
But you might also want to use the inkjet printer for multi-color and complex designs; when layering won’t work as well (and when you can’t afford to upgrade to sublimation printers). In this case, you might be after inkjet printable vinyl so that you can use it in combination with your favorite vinyl cutter.
So if you have been wondering if you can you print on vinyl printer paper using your home printer, well then yes you can and we will show you how!
What you Need to Know about Printable Vinyl
If you wish to try printing on vinyl from an inkjet computer, it is so important to get the right type of vinyl. The vinyl you purchase MUST be print receptive.
Which means that there should be a film coating on the vinyl printing paper that can act as a carrier for the ink. We want to make sure that the color won’t bleed or fade and that the vinyl will actually stay adhered to our item.
So we have a choice of either finding a vinyl that has some sort of lamination as protection, or you will need to go a step further and actually laminate your vinyl design yourself.
We personally love using:
1. Expressions Vinyl Printable Vinyl Sheets
Expressions Vinyl Inkjet Printable Vinyl which is a permanent vinyl. It is a sticky adhesive and it comes with a clear laminate sheet that protects the ink from fading, bleeding or scratching. It does pretty well on items such as cups that will get wet.
>>> Click here to check current pricing for Expressions Printable Vinyl
2. Cricut Printable Vinyl
Cricut Printable Vinyl which is a brilliant vinyl for die-cuts. Is Cricut printable vinyl waterproof? This vinyl doesn’t hold up as well when it gets wet, so I would recommend this vinyl when you are creating colorful DIY vinyl decals and die-cuts that won’t need to get wet.
>>> Click here to check current pricing for Cricut Printable Vinyl
3. Papilio Printable Vinyl Paper
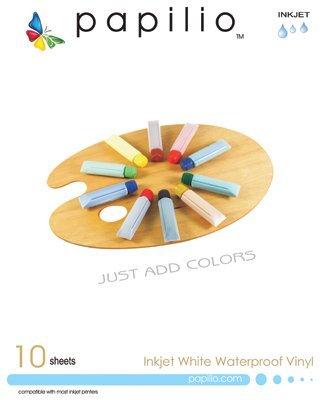
Papilio Inkjet White Waterproof Vinyl which is another high-quality brand. The Papilio vinyl sheets are waterproof and if you add a laminate layer they will also hold up really well outdoors.
>>> Click here to check current pricing for Papilio Inkjet Vinyl
–
__________________________
–
Tutorial: How to Print on Vinyl
Find below some helpful steps on how you can make your sticker and decal and get it printed out onto vinyl.
Supplies Needed:
Step 1: Create your own design
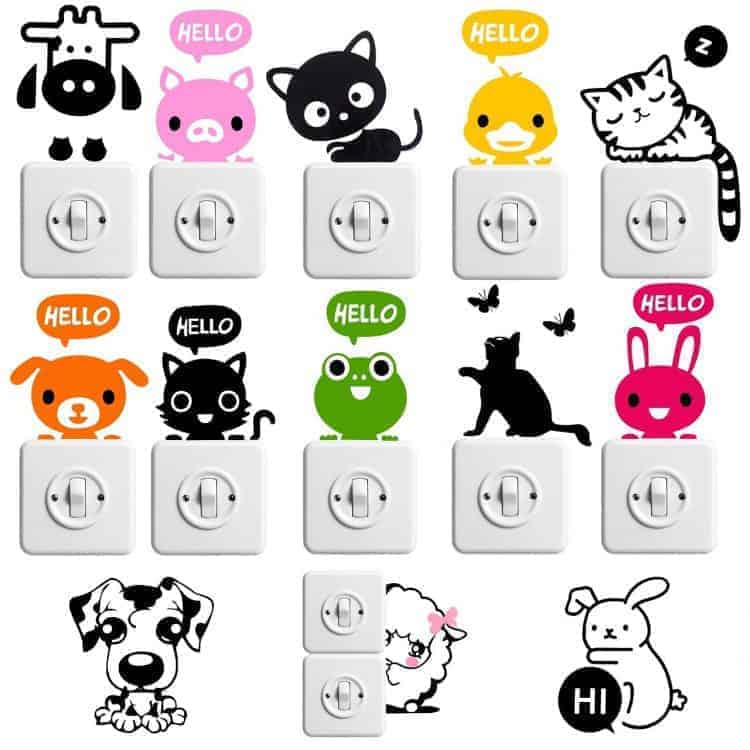
The first thing that you will need to do is to draw up inspiration for the designs you want to use. There are three ways for making your own personalized designs. Creating your own designs will be fun and show your artistic ability.
Below you can find ideas of how you can go about either finding a premade design or how you can go about making your own design.
Research other designs
Because there are tons of images online, you can search through the web browser and type in certain design images that you desire to create a sticker. Drawing inspiration from others is what may give you a boost in opening your own creativity.
You can search through a variety of stickers that are printable on vinyl by using simple keywords search such as “vinyl stickers,” “printable vinyl stickers” or “vinyl sticker designs.”
You might also like to check out our list of free SVG file downloads for those of you who use a vinyl cutter.
Use image editing software
There are so many software programs that’ll provide you with tools for creating and editing images. If you are someone who’s competent in software such as Illustrator, and Photoshop, you can easily create your own images with the software’s drawing and editing tools. It is easy to learn how to use this particular computer software for image creating and editing.
If you cannot afford the Illustrator and Photoshop software, alternatives that are equally great and free software to use are Canva, GIMP, and MAGIX.
Sketch your own custom design
You can sketch several renderings of your own custom design before finalizing the design on a computer. The design image can be sketched on an 8×11 piece of paper and scanned to your computer.
Then you can begin to edit your design with any free photo editing websites like Pixlr, FotoFlexer, PhotoCat or Picfull.
Step 2: Printing your Designs on Vinyl
1. Using a Home Printer that Prints on Vinyl
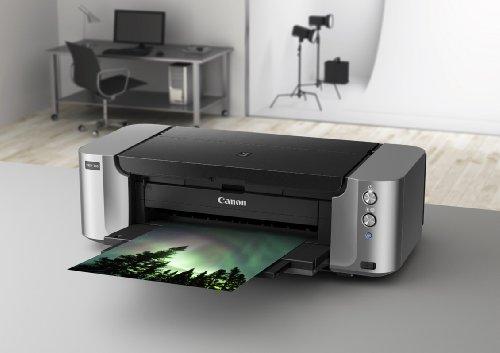
Inkjet printer: You will need a 4-color Inkjet Printer with a 1200 dpi print resolution (Click here to see prices for our favorite printer). Load the inkjet printer with 8 x 11-inch printable vinyl sticker paper making sure that the adhesive side is up so that the ink prints on the non-adhesive side. If you are not certain how your printer will print on the paper, it is safe to test print a sheet so you’ll do it correctly the next time.
You might find it helpful to watch this video on how to print on inkjet waterproof printable vinyl:
2. How to Print on Vinyl using your Cricut Machine
Here is some step by step instructions on how to print on vinyl using your Cricut Machine.
3. How to Use Printable Vinyl with your Silhouette
Here is some step by step instructions on how to use your Silhouette Machine to print on vinyl.
Step 3: Laminate and Cut your Sticker Designs
As mentioned before, we will need to apply a laminate layer over the vinyl sticker/decal to ensure longevity. Some of the printable vinyl packs come with a laminate layer, whilst with others, you will need to purchase this additionally. Click here to see our personal favorite Papilio Over Laminate.
Here is a video that shares a few tips on how to get the best laminate effect:
–
Step 4: Adhere your New Vinyl Sticker/Decal to your Item
Peel off the vinyl sticker adhesive back and apply the sticker wherever you desire it.
Learning how to print on vinyl isn’t as hard as it may sound. Easily design and print stickers with minimal tools to get you started. Stickers are popular as a playful or casual decorative symbol for kids, teens and even adults. Stickers can even have a great impact when it comes to marketing to consumers as well as making sticker logos.
I hope you enjoyed reading this article and are now getting your tools ready for making some awesome stickers. ENJOY!
via The Best Vinyl Cutters | Reviews & Guides https://www.thebestvinylcutters.com/how-to-print-on-vinyl/

Posted on August 4th, 2018
What are Die Cut Stickers? [An Expert Explains]
With so many different types of stickers on the market, it can be slightly frustrating to work out exactly which type of sticker it is that you require for your project. Often it can be challenging to see the difference in the type of stickers online due to them all being on a white background.
Today we wanted to lay it all out in easy to understand terms. We will have a closer look at what die cut stickers are, what the difference is a between a standard shaped and die cut sticker, as well as what the difference is between a die cut and kiss cut sticker.
Die Cut Stickers Explained
A die cut is essentially a custom-shaped sticker. They are single stickers that are cut to the contour of the image shape. So essentially there is no excess material around the sticker.
Here is a quick video for visual representation:
Standard vs Custom Die Cut Stickers
1) Standard Shaped Stickers
Back in the “old days” stickers only came in standard shapes such as rectangles, squares, ovals or circles.
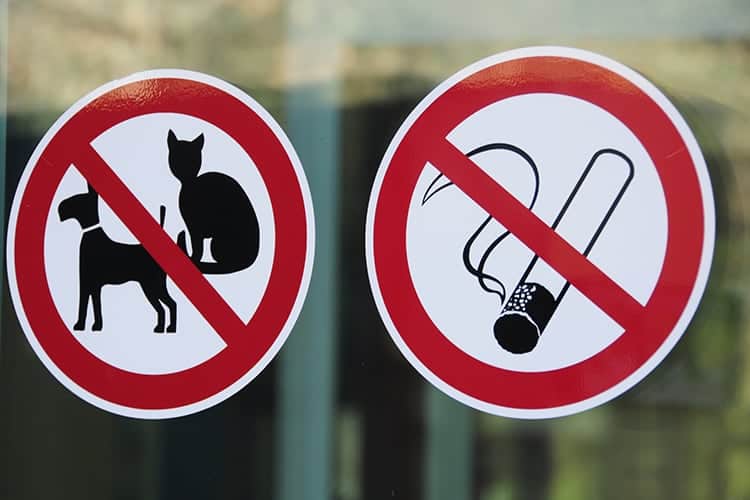
It was easier to cut stickers in this shape due to the fact that stickers were cut using a die together with a manual die cutting machine.
Wikipedia explains what dies are:
A die is a specialized tool used in manufacturing industries to cut or shape material mostly using a press. Like molds, dies are generally customized to the item they are used to create. Read more about it here.
2) Custom Die Cut Stickers
The newer and more modern way to create stickers is to die cut contours to the shape of your artwork. These stickers are great for designs that are used to brand a product as they look a lot more professional. You will also often see these type of stickers used as wall decals and as logo stickers.
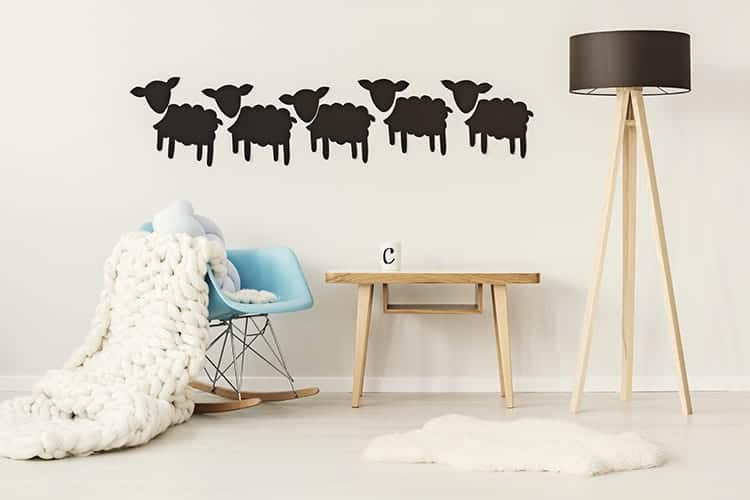
Not only are these stickers popular in the professional arena, but many crafters, specifically those interested in scrapbooking and cardmaking, also prefer to use die cut stickers above standard shapes stickers such as squares, squares, and ovals.
Other uses for these type of stickers includes magnets, car decals, iron-on, shop window stickers and more. We personally prefer using die-cut stickers ourselves and fortunately, you can easily and quickly create your own custom die cut stickers in whatever size you want by using an electric die cutting machine.
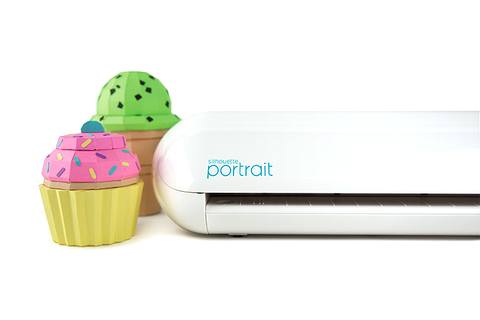
We explain how an electronic die cutting machine works here on our website:
Materials are cut similarly or closely in the way a printer prints. Ultimately while using this machine, your designs will be sent directly to the digital cutter from your computer or tablet, where your created designs are made. You can read more about it in this post here.
Die-Cut vs Kiss-Cut Stickers
Whilst die cut stickers are custom-shaped stickers that has no excess backing around the contours of the image, a kiss cut sticker only has light cuts within the border of your stickers.
A kiss cut sticker can be peeled out of the backing material and the backing material remains. You might recognize kiss cuts stickers better as a “sticker sheet” as kiss cut sticker typically comes as multiple stickers on one single sheeting in comparison to a die cut sticker that comes as a single sticker.
Here is an example of kiss-cut stickers:
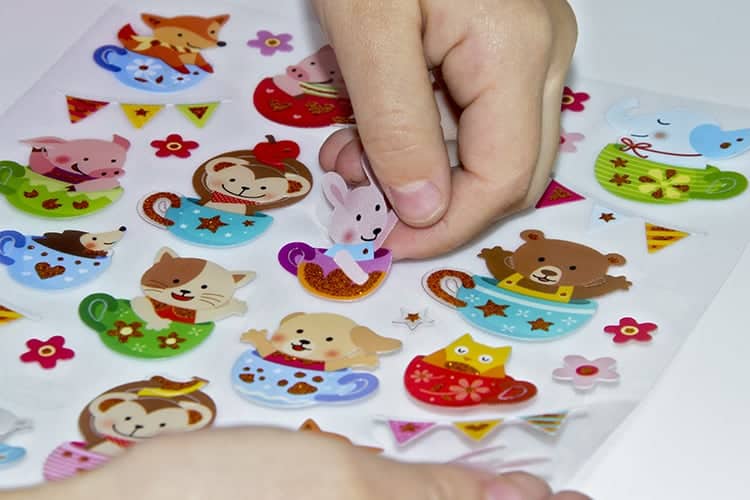
Further Reading:
via The Best Vinyl Cutters | Reviews & Guides https://www.thebestvinylcutters.com/what-are-die-cut-stickers/

Posted on August 2nd, 2018
Here are Some Scrapbook Title Ideas for When you Feel Stuck!
Sometimes titles just happen automatically. You see an image and you know straight away what the title will be. At other times, you might end up completing the layout and simply getting stuck on ideas for the title.
Not only should the title … well title the idea of the layout …. but it can also form an important part of finishing off your layout with just the right embellishments.
Ideas of What You Can use for Your Titles
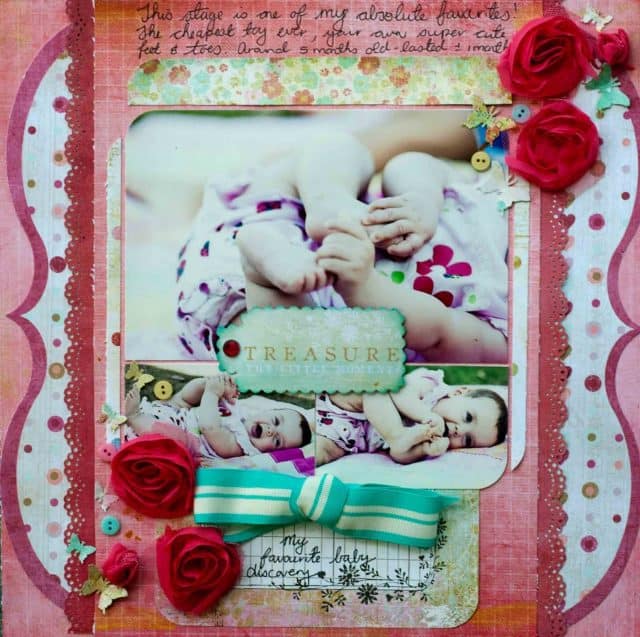
I often use my titles as my ‘wow-factor’ of my page. When done right the title can add to a page and form part of the embellishments for the layout. Think about whether you need a strong powerful type of title from a heavy material such as foam or chipboard, or whether a soft delicate title would suit your layout style better.
Things you can use to create your title:
Quick Title Ideas
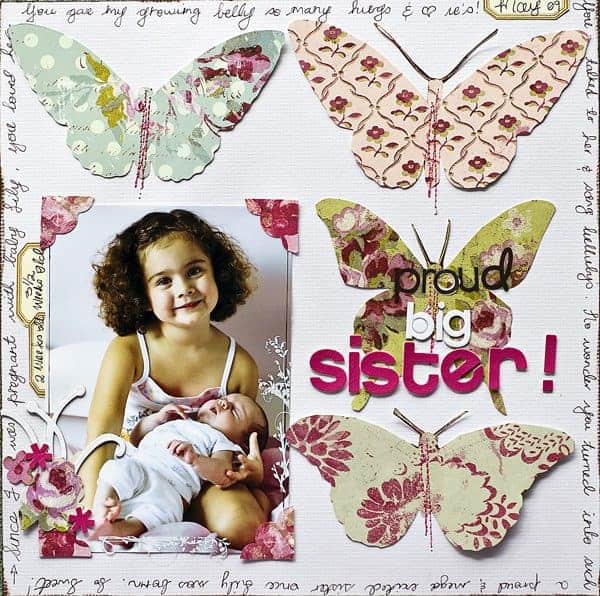
How to Display your Title Creatively
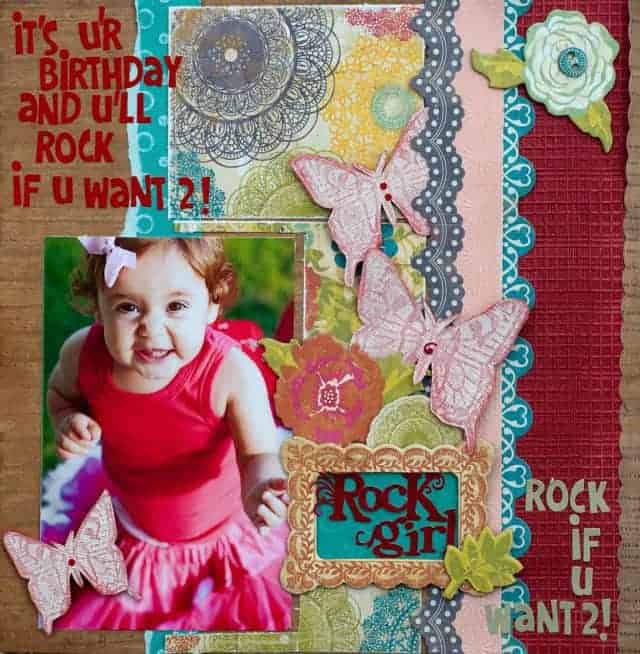
Here are some ways that you can display your title in a creative manner:
More Places to Get Scrapbook Title Inspiration
Looking for more title inspiration? These sites are brilliant as they contain a whole directory of title ideas, all organized and sorted according to topics and themes.
1. Scrapbook.com
Scrapbook.com has a brilliant selection of titles that you can find sorted according to topics. They also have a search bar so you can simply pop in your own topic and it will give you some beautiful title suggestions. Our go-to site!
2. The Perfect Title
An older website that really could do with a few modern touches, but it still does what it aims to do. Loads of title ideas all sorted into categories such as Amusement Park, Arts & Crafts, Circus, Dirt & Mud, Growing Up, Moving, etc.
3. Denny Davis
Another resource with ideas sorted by categories. A huge collection that is worth checking out.
4. d’Marie Page Toppers
This website is easy to use because rather than get lost in categories, you can simply enter your own search terms and the search engine will find relevant ideas for you. It has over 2500 title ideas and you can also add some of your own to help the database expand.
5. Amazon Books
You can also find some brilliant books on Amazon that focuses on titles. Sometimes it is easier to have a book on your scrapbook title rather than having to bother with hopping online.
I hope that these sites will give you some inspirations to come up with some creative titles of your own.
via The Best Vinyl Cutters | Reviews & Guides https://www.thebestvinylcutters.com/scrapbook-title-ideas/

Posted on July 30th, 2018
Essential and ‘Must-Have’ Scrapbooking Supplies List to Help you Get Started!
Wondering which scrapbook supplies you should invest in to set yourself up with your craft hobby? There are so many scrapbooking supplies, products, and tools on the market that it can be truly overwhelming if you are only getting started. And let’s be honest, some of these tools and supplies cost a lot of money.
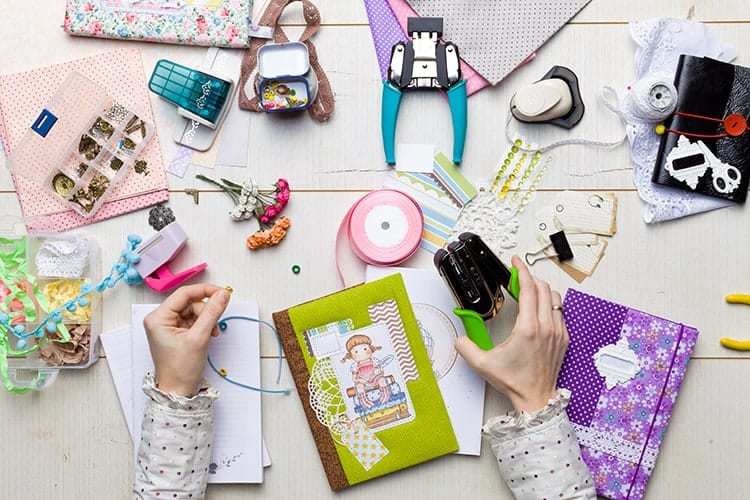
So we wanted to create a scrapbook supplies list for both the essential items as well as those that are handy-to-have to help you get started. But before I hop into the detailed post about why you need each item, here is an easy-to-scan supplies list.
Essential Scrapbook Supplies:
Handy-to-Have Scrapbooking Accessories:
Scrapbooking Supplies List – Why You Need It!
Find below a bit more information and explanation as to why you need each of the items listed above. We will also share our recommendations for the best products to purchase for your scrapbooking needs.
1. An Album
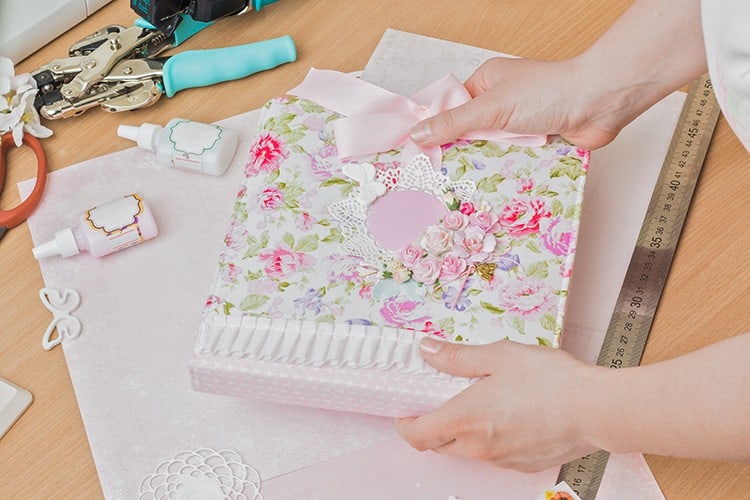
Once you get addicted to scrapbooking it will take you no time at all to fill every free spot in your home with a new album. I have about 40 albums in my home (EEEP!) and the tips and advice I can share with you are to plan ahead. I find that my shelves look so much better when I use the same brand album and stick to a color theme.
I use a different colored album for each of my kids and yet another color for my family albums. They are all the same brand and they look great together on a shelf.
Another tip is to make sure that you stay clear from the postbound albums. It is way too hard to switch around pages in those albums. And I also found that they are too ‘stiff’ for bulky pages – and they don’t hold nearly as many pages as a D-ring (or three-ring) album.
One last tip (yes I’m full of tips – years of experience), is to make sure that the refill pages of the album you want to purchase actually fits 12×12″ layouts (we want them to be roomy to fit bulky layouts). Too often have I had to trim down a completed layout in order to make it fit into tight refills.
are highly popular with its easy to insert and easy to remove page protector system, making it a breeze to switch pages around.
Here are some of my absolute favorite albums:
2. Refill Page Protectors
Page protectors are important to keep your pages as protected as can be. Don’t go cheap here as you want good quality refills that are acid-free. I also prefer refills that have their opening of the pocket to the top rather than on the side.
If you are purchasing a post bound album, you will get an album that typically has around 10-page protectors inside it. I recommend you purchase another 10 and add these into your post bound album.
If you are buying the D-ring/3-ring albums, you will need to purchase refills separately. Fortunately, you can easily purchase some “universal” page protectors that can fit well for various brands.
Click here to see pricing for some of our favorite page protector brands.
3. Cardstock
Cardstock will form the base of almost everything in scrapbooking and honestly, you can’t go without it. Cardstock is thicker and heavier than patterned paper, so a lot of scrapbookers like using it for the base of their layouts. You can also use it to matt your photos.
If you are getting started I highly recommend you invest in some cardstock starter packs. That way you will have a large range of colors to get you started whilst mixing and matching papers and elements with your photos.
I absolutely adore Bazzill Basics cardstocks. I’m a big fan of the colors, weight, and texture of their cardstocks.
4. Patterned Paper

It is super important that the paper you purchase should be acid and lignin-free. So whilst patterned paper can add up in cost quickly, I highly recommend you stick to purchasing proper scrapbook paper. This paper has been designed to keep your photos from yellowing.
Patterned paper is great for layering. I also use patterned paper off-cuts to make my own embellishments as well.
5. Sharp, Fine-Tipped Scissors
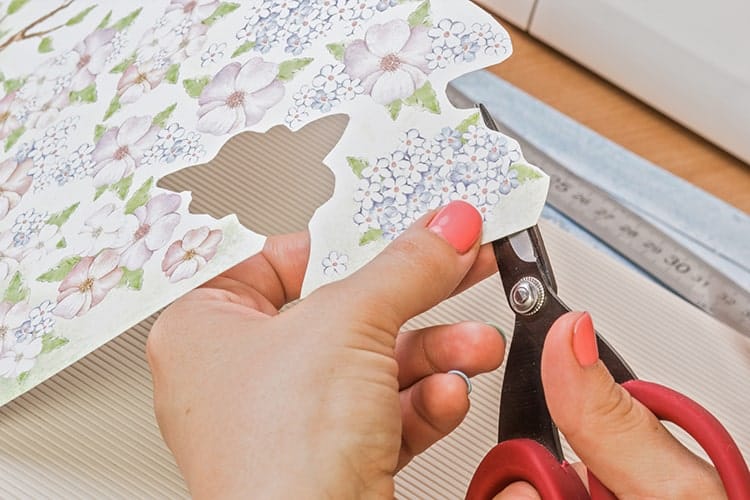
You can’t go without a pair of sharp high-quality scissors. Trust me, it is worthwhile to invest in a quality pair! I also prefer fine-tipped scissors so that I can cut out those intricate details when making my own embellishments.
Again, we recommend purchasing scissors from scrapbook brands. These specialist scissors are the best because they have been specifically designed for scrapbookers.
Here’s a few of the best available:
6. Paper Trimmer
I can’t go without my paper trimmer! It is one of the best investments. A good trimmer will let you slice up quick, accurate cuts to your papers. Look for one that has a see-through ruler and take the time to see how much the replacement blades will be. Some trimmers also come with self-sharpening blades and others include additional blade options such as for scoring or for cutting patterned edges.
My favorite brand for trimmers is Fiskars. They have a range of trimmers to suit different budgets but this trimmer is my favorite: 12″ Premium Cut-Line Portable Trimmer – Blade Style I.
7. Adhesives
You can’t go without adhesive and you will also need a few different types of adhesives to set you up properly.
You want a good quality permanent glue that will keep things stuck down for years to come! We prefer having the following types of adhesives on hand:
Some favorites include 3L Scrapbook Adhesives, Tombow, and Glue Dots.
—
8. Embellishments
Embellishments are fun! Embellishment types include buttons, ribbons, bling, flowers, frames, photo overlays, journaling cards, tags, die cuts, stickers and more.
Use embellishments sparingly, the aim is to use the embellishments to enhance your page. But the focus should always remain on the photo.
Handy-to-Have Scrapbooking Accessories
The following items on our list are by no means essentials, but we find them truly handy to have and we use them on a regular basis.
1. Craft Cutting Machines
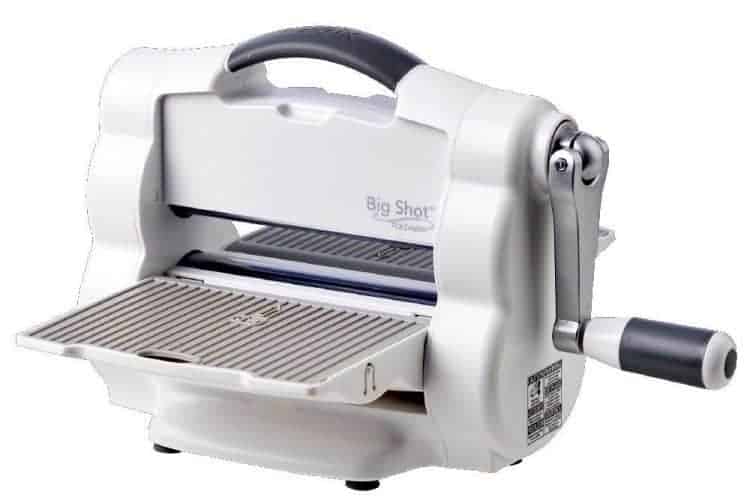
I really think that once you get to a stage where you become a serious scrapbook, you will find yourself investing in one of these babies. They truly are the ultimate scrapbook tool to own. They make life simpler, they make scrapbooking more flexible and in the long-run, they save you money on pre-made embellishments as they can make your own.
The following post on our website defines what cutting machine is.
Materials are cut similarly or closely in the way a printer prints. Ultimately while using this machine, your designs will be sent directly to the digital cutter from your computer or tablet, where your created designs are made. See full post here
If you want to get started with a cutting machine, we highly recommend you hop over to our die cut machine comparison post.
2. Paper Punches
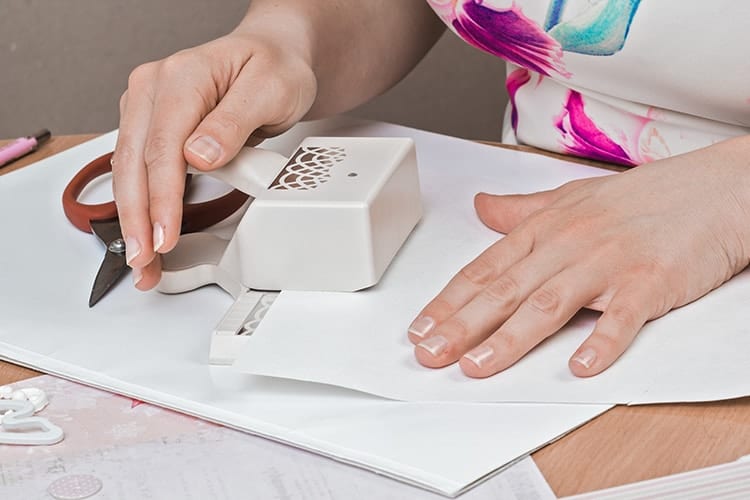
Paper punches are really handy to have on hand. It makes life easier and they are easier to pull out in comparison to a cutting machine. We have both a cutting machine as well as a small selection of punches in our craft room.
My favorite punches are:
3. Photo Printer
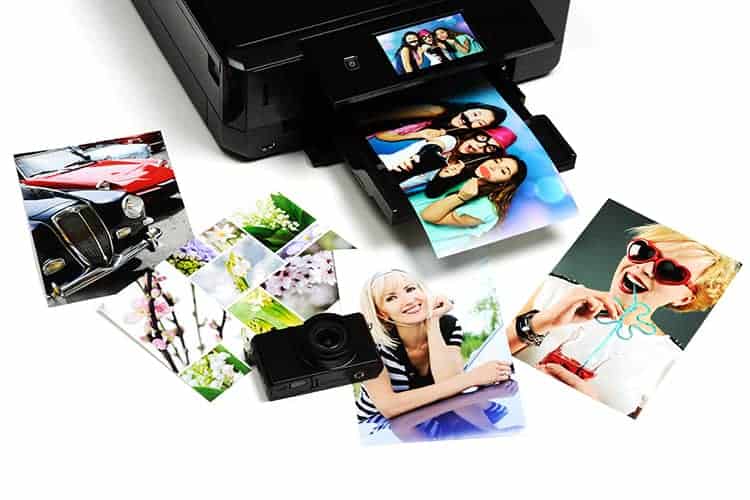
I can’t be bothered ordering my photos online and waiting for them to arrive. When I’m in the mood to scrap, I want to choose an image that speaks to me and print it off to get started straight away. Photo printers are really affordable these days.
Here are some good investments:
4. Cutting Mat
A cutting mat is a fabulous item to have on hand for when you need to protect your work surface. I often work on the dining room table so I will use a craft mat to protect my table from glue, glitter as well as cuts made with an x-acto knife. I love the large-sized self-healing cutting craft mats by Crafty World.
5. X-acto Knife
Craft knives are pretty cheap and they are always handy to have on hand. We will often use them to cut out areas in the middle of embellishments. I use them to make a small hole in photos etc before adhering a brad (as it is tricky pushing a brad through thicker items). They are cheap, so grab one and have it on hand.
6. Journaling Pens
Make sure to choose pigment ink based pens. Bonus if they are fade-proof & water-proof. If you wish to write on your photos you will also need to make sure that they are acid-free as well. My essentials are black and white, so grab those two to set you up.
Some brands to consider: ZIG and Sakura.
Further Reading:
via The Best Vinyl Cutters | Reviews & Guides https://www.thebestvinylcutters.com/scrapbooking-supplies-list/

Posted on July 25th, 2018
10 Reasons Why I Love the Cricut Explore Air 2 Machine
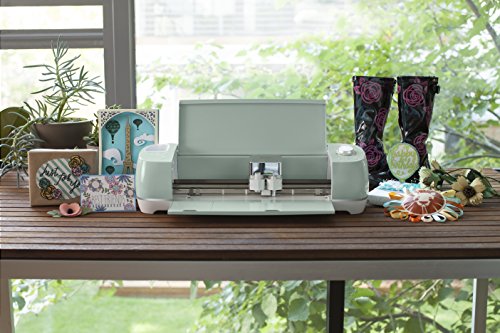
The Cricut Explore Air 2 might not be the newest Cricut machine out in the market, but none-the-less it is one of my favorites and one of our best selling machines.
Here are 10 reasons why I still love my Cricut Explore Air 2 cutting machine.
Here are 10 Reasons Why I Love the Cricut Explore Air 2 Cutter
1. It Can Cut over 100+ Materials: We love how versatile the Air 2 cutter truly is. It can slice through over 100 different types of materials. Not bad huh!! Wondering what it can cut? Click here to see the full list.
2. Free access to Cricut Design Space: The Design Space might not allow you as much creativity as software such as Adobe Illustrator might, but we love it because it is fabulous for beginners. It allows you to do all of your designing in one place (for free)! It also comes with 3,000+ ready-to-make projects and quick cuts.
Another thing that we love about the software is that it is cloud-based. Which means that you can design your cut file from the comfort of your sofa whilst watching a bit of TV and then simply send it wirelessly to the cutter
3. Cricut Image Library: For just $9.99 a month you can have access to over 30,000 cut-ready premium images as well as access to over 400 beautiful fonts. There are many other benefits to becoming an access member, read more about it here.
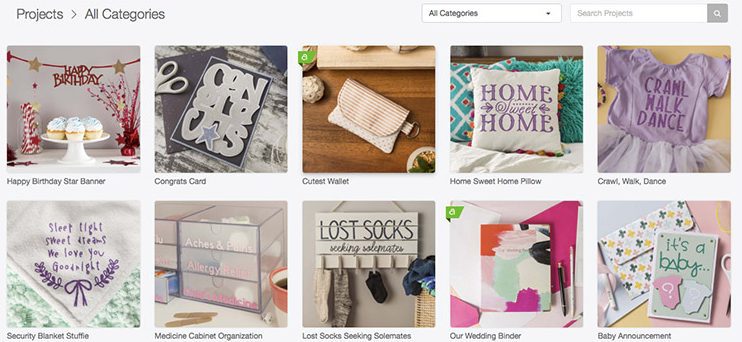
4. Use your Own Fonts: Yes, on top of grabbing the incredible value deal of the membership, you can also use any other font that you can find online. There are many free SVG files available online.
6. Use your Own JPG, PNG, GIF & SVG Image Files: Yes, just like with the fonts, you can also source any free-to-use images online, upload them to the Cricut Design Space and then cut them out!
4. SmartSet Dial: The smart dial eliminates to so much guess-work out of which setting for the pressure you need to use to match the thickness of your material you wish to cut. The smart dial makes cutting easy for even the beginners. Simply select the right setting and cut.
7. ZOOM ZOOM – Super Fast Cutting: The Explore Air 2 is twice as fast as its predecessor. That is a MAJOR improvement and brings this machine up to scratch with more expensive and more professional cutting machines. Fast cutting means you have more time to create!
8. Draw and Cut Feature: Another time-saving feature is the ability to be able to draw and then cut out your design in one smart process.
9. Print and Cut feature: Another feature which just proves how versatile this machine truly is, is the ability to print your image from your printer and then pop it on your mat for the machine to cut out. Easy-peasy.
10. You can Design from your Computer, Laptop, Tablet or iPhone: Not in the mood to design with your heavy laptop? No problem, grab your iPhone and design away. Because the software is cloud-based, it will even sync across all your devices. You can design offline as well, which is great news for those who struggle with connectivity.
The Cricut Explore Air 2 is a fabulous machine and it has an incredibly awesome price tag on it when compared to similar machines from other brands. If you haven’t done so yet, you might like to read our in-depth Cricut Explore Air 2 Review, see how this machine compares to other machines that cut vinyl.
If you are convinced that this is the machine for you, we highly recommend you save some money by grabbing a Cricut Explore Air 2 bundle.
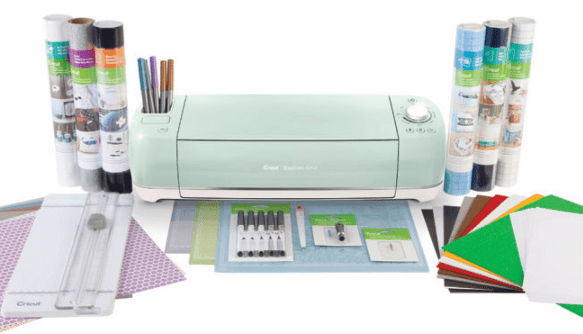
If you have any other questions about this machine, please leave them in the comments below.
via The Best Vinyl Cutters | Reviews & Guides https://www.thebestvinylcutters.com/the-cricut-explore-air-2/

Posted on July 23rd, 2018
Heat Press vs Iron: Which One is Best for You?
A heat press costs a lot more than a simple iron does. So it is only fair that you question whether you do in actual fact need a heat press machine for your heat transfer projects.
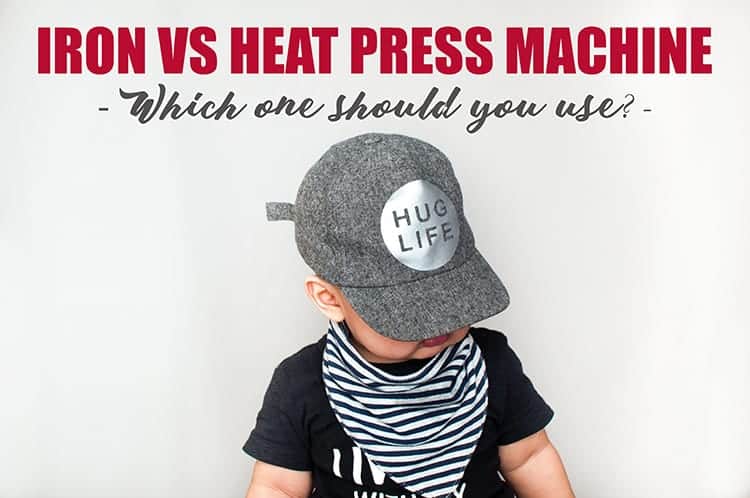
In our post today we will have a heat press vs iron battle-off. A successful heat transfer is all about having the right time, temperature and pressure. If you can get those three elements right, you will have a heat transfer that is perfectly adhered to your products of choice. Get those three wrong and your transfer won’t stick to your surface very well and will most likely come off in the near-future.
Let’s look at the pros and cons of each and discuss which tool would be best for your specific needs.
Heat Press vs Irons
1. Irons
Irons are a great tool to have around a home. You can do so much more with an iron than simply iron clothes … in fact, I think my iron almost never gets used to iron clothes, it mostly gets a work out for craft purposes.
Irons are great because they are cheap, they are easy to store and easy to port around. And most households already have one, so you don’t even have to purchase one.
Here are some pros and cons of using an iron for iron-on transfers.
PROS:
CONS:
Verdict
Irons are an excellent choice for those who are beginners. They are also perfect if you know that you will only be doing heat transfers only occasionally (so it won’t make sense to invest in a heat press then). We definitely don’t recommend them for larger projects, but they can work great for smaller designs.
It also depends on what you are doing? For example, it is easier to work on T-shirts when you iron as the product is flat, but once you start working on items such as caps it can get trickier. Fortunately, you can buy attachments for a heat press to make jobs like those super easy.
Don’t expect your design to last forever, as durability of the iron-on is much shorter in lifespan in comparison to those adhered with a heat press. Because you can’t control the temperature and pressure with an iron, iron-on are more likely to peel.
For more professional results, we highly recommend that you invest in a heat press.
2. Heat Press
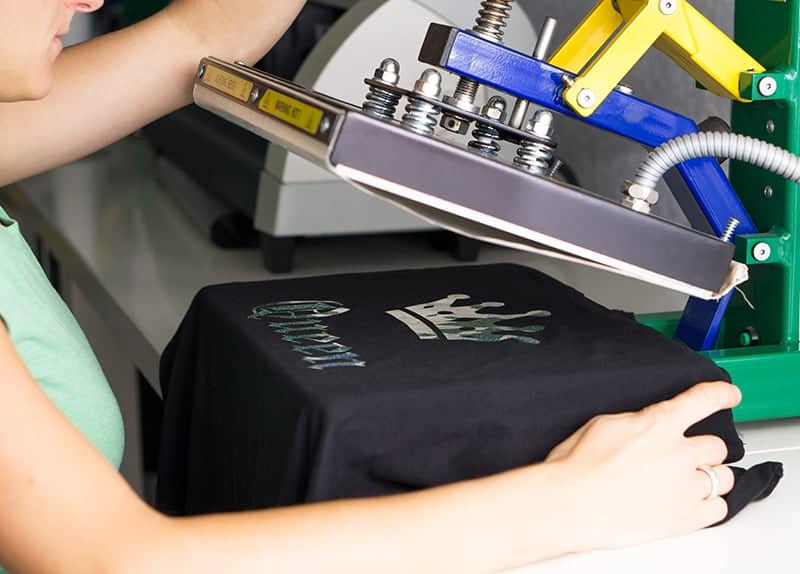
A heat press is, of course, the professional tool for applying heat transfers. Unlike irons that have been designed too well … iron wrinkles out of clothes, a heat press has specifically been designed to heat press designs. They are fabulous for those of you who know that you will be working with iron-on on a regular basis.
PROS
CONS
Verdict:
A heat press is a machine that has been designed specifically to adhere transfers to garments and products. As such you can control the exact temperature, adjust the pressure as well as set a timer to help you get a perfectly adhered designed.
The temperature of the plates are also evenly distributed and the larger work area (typically around 15″x15″) will allow you to work with larger designs.
Without a doubt, a heat press will help you to create more professional and longer-lasting heat transfers. We won’t even bother with the frustration and hassle of using an iron. With an iron, it really comes down to good luck. With a heat press, it is all an exact measured science to get the best results.
Fortunately, you can find some really affordable heat press machines these days. Why not check out our heat press machine reviews to help you find the best starter heat press for you and your needs.
via The Best Vinyl Cutters | Reviews & Guides https://www.thebestvinylcutters.com/heat-press-vs-iron/

Posted on July 19th, 2018
15 Fabric Cutting Projects You Can Make With The Cricut Maker
If you’re trying to expand your creativity for using the Cricut Maker, there are many projects that you can take on with endless possibilities.
There are many unique things about this machine that will make you want to use it more and more.
Although there’s a wide variety of projects, using your imagination for DIY projects will prove that you have a creative and unique eye when it comes to using this machine. We love using the Maker for fabric projects.
One of the major selling points of the Maker is that it can slice through material due to its included Rotary Blade. The rotary blade has a special gliding and rolling action (together with a massive 4kg of force) which allows for super sharp and clean-edged fabric cuts.
It comes with a fabric cutting mat, so you can cut all kinds of fabrics without using any backing. Simply choose an item to make from the massive sewing pattern library (including some from Simplicity and Riley Blake Designs) and ask the machine to cut out your pieces for you.
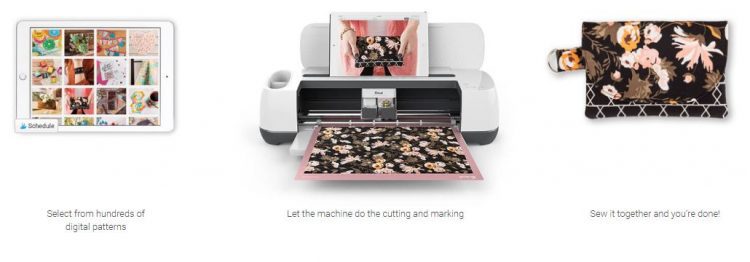
Below is a list of fabric cutting projects that you can master in no time. You can also read our detailed Cricut Maker review here or if you prefer you can compare the machine to other popular fabric cutting machines here.
Fabric Projects to Try with your Cricut Maker
1. Quilts
The Cricut team has been making advances in bettering its design quality for quilt making. Cricut has teamed with Riley Blake Designs to provide crafters with a wide variety of quilting patterns within the pattern library. You can accurately cut out the right patterns for sewing and make the perfect quilt with ease.
2. Felt Dolls and Soft Toys
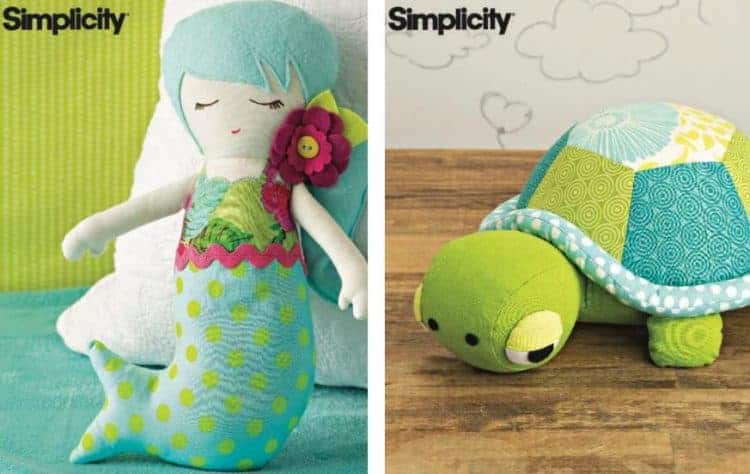
You may want to make toys on your own as a DIY. The Cricut maker easily allows you to cut patterns for soft felt dolls and soft toys. You can make a variety of different dolls for your kids. Aren’t these two above incredibly sweet!?
3. Baby Clothes
The Cricut Maker can cut panels up to 12 X 24″. So whilst it will be tricky to make adults clothes with it, it is great for making baby clothing. Make and cut patterns so you to make baby t-shirts, onesies, shorts and more.
4. Doll Clothes
Since you’re going to make dolls with the Cricut Maker, you can make them cute little doll outfits that will make them look more unique. Make multi-color doll clothing that will make your Cricut dolls stand out amongst your store bought dolls.
The Cricut Maker worked so amazing to cut out and mark my fabrics for this cute doll dress that I made. @OfficialCricut #ad #sewcricut #cricut #cricutmade #cricutmaker https://t.co/8kRaxsf83k pic.twitter.com/6Rf3Y6YMHY
— Anna Metcalf (@chem_chic) March 2, 2018
5. Fabric Christmas Projects (Ornaments and Christmas Stockings)
Using the Cricut Maker will make cutting fabric for making ornaments and Christmas stockings a breeze. This machine is perfect for designing one-of-a-kind fabric ornaments and/or stockings. The machine has a pattern library that you can use to blend different looks of Christmas or holiday decorations. Simply use the machine to cut your pattern out and then sew it together – easy peasy!
Did you know that with a #Cricut you can make your own felt ornaments? Try it, it’s easy! https://t.co/uHWF8TYZbt pic.twitter.com/NadJbV4CeE
— Cricut (@OfficialCricut) December 4, 2015
6. Fabric Appliques
Although you’ll need a bonded fabric blade in housing, you can also make a series of fabric appliques. These blades have to be purchased separately but, once you have one you can make many different intricately designed appliques with your applique fabrics.
Important to note that unlike the with the rotary blade, the bonded fabric blade does require you to have bonded backing on your material.
7. Fabric Keyrings
Quite simple to make and growing more popular are, fabric keyrings. There are easy designs in the pattern library. Dress your keys up with fashionable fabric keyrings.
Cricut Simplicity Key Ring Tips and Tricks #cricut #cricutmade #cricutmaker #ad https://t.co/9LHHmGaUVO pic.twitter.com/0JHLFcLpXH
— Alicia Steele (@SewWhatAlicia) June 6, 2018
8. Fabric Coasters
If you’re wanting coasters for your coffee tables or any other area of your home, office or elsewhere, make them with the Cricut Maker. You can cut different materials like leather, metallic, quilt sheets and more to make coasters.
9. Pin Cushions
It’s likely you’re going to be doing a lot of sewing with the Cricut Maker. As you get all of your beautiful designs cut out, you’re going to need a pin cushion to hold all your pins. There are different pin cushion designs in the pattern library, but, you can get creative and make your own uniques ones too.
10. Pillows and Cushions
Since the machine cuts 12 X 24 sized patterns, you can make lots of different pillows and cushions for your bed, chairs, couches, and nooks. You can make several great designs to spruce up your home. Don’t forget that you can cut out iron-on vinyl on your maker too, so why not take your cushion design to the next level.
Jungle prints are a top-five #crafting trend at the moment, says Hobbycraft. So here’s our recommended project for the weekend: the Cheetah Spots Jungle Pillow! Get all you need and follow the steps here https://t.co/gOI3lIDWNd #CricutCreations #CraftTrends #JunglePrints
pic.twitter.com/06jJxaJmvA
— Cricut (@CricutUK) April 27, 2018
11. Kids Clothes
Why not whip up some special items for your kids. We love this DIY boys swimsuit.
Spending your Saturday by the pool? @heatherhandmaid used her #CricutMaker to DIY a swimsuit! Check it out on her blog: https://t.co/p7oTwvwzTS #CricutMade pic.twitter.com/zdImqDEQUP
— Cricut (@OfficialCricut) June 2, 2018
12. A Sewing Organizer for your Cricut Maker
Here is a clever idea. Why not whip up an organizer to keep all of your sewing supplies on-hand whilst you work with the Cricut Maker.
Featuring unique cutting versatility, a huge library of design ideas and sewing patterns – the Cricut Maker is the ultimate smart cutting machine:
https://t.co/EjPYWi8DyE pic.twitter.com/3Js4KN9iMF
— Cricut (@CricutUK) June 8, 2018
13. A Kids Backpack
Why not create a totally unique backpack for your daughter or son? That way you can theme it according to their interests and passions and you can add some lovely personalization to it as well.
My first backpack, I cut all the pieces on my @CricutUK Maker, my daughter loves it #Cricut #cricutuk #makermade #cricutmaker pic.twitter.com/bGM6v274sW
— Laura Cook (@laura_cook21) February 14, 2018
14. Maker Dust Cover
Another really clever idea. Why not make a beautiful dust cover for your special Cricut Maker machine. The machine is pretty pricey so you might just as well look after it properly to ensure that it lasts for a long time yet to come. Select the cover design from your sewing library and sit back whilst the machine does its magic.
A beautiful new crafting machine deserves a dust cover to match. Luckily this one for the Cricut Maker is free to download on the Design Space! Check it out: https://t.co/PDlwnMIKPh pic.twitter.com/qnLEyyEB7m
— Cricut (@CricutUK) January 12, 2018
15. Purses and Clutches
There are some incredible sewing patterns for coin purses, full-size purses and clutch bags available in the library. You can even take this a step further and make some wonderful leather purses as well.
Today’s @CricutUK Maker creation, a fold over purse using @OfficialCricut fabric and some diamanté faux leather from @Hobbycraft_MDE #cricut #cricutcreator #cricutcraftcreators #cricutuk #hobbycraft #cricutmaker #makermade pic.twitter.com/Fcwg4iRAek
— Laura Cook (@laura_cook21) June 15, 2018
There are so many more ideas of what you can make with your machine, from dog coats, to aprons, to leather dog collars, to passport holders. Have a fun time working your way through all the beautiful sewing ideas.
If you like, we would love to hear more about which project you will be attempting next. Please leave us a comment below.
via The Best Vinyl Cutters | Reviews & Guides https://www.thebestvinylcutters.com/cricut-maker-fabric-projects/

Posted on July 16th, 2018


